Yanagiba Knife: How the Sashimi Blade Works (2026 Guide)
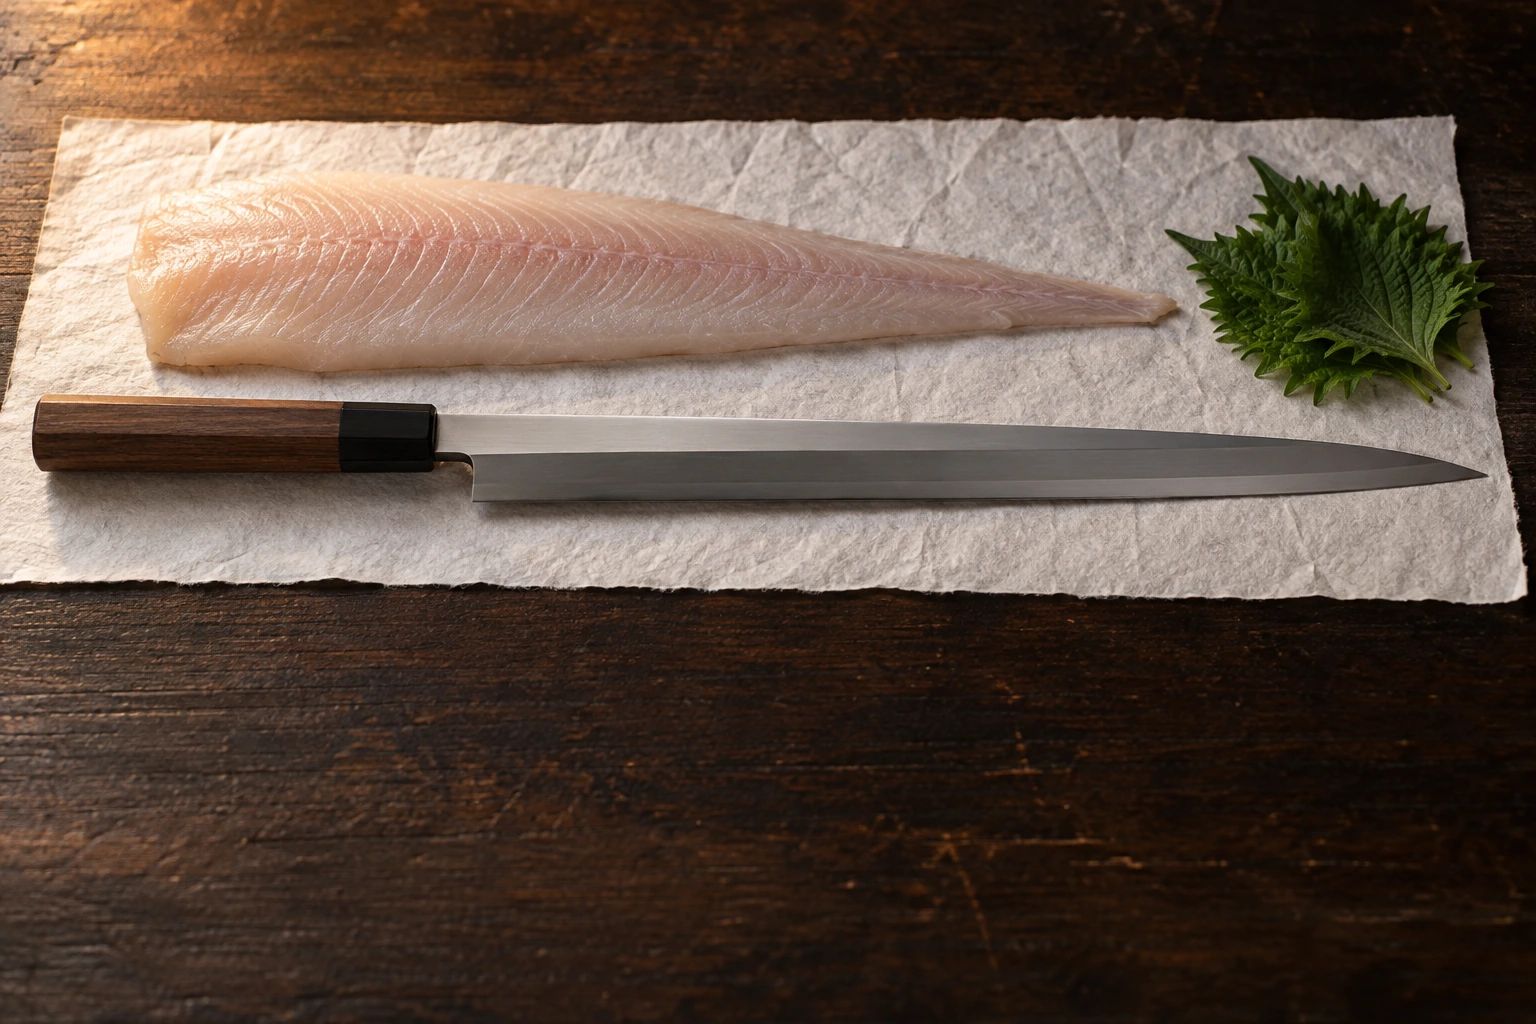
Table of Contents
The yanagiba (柳刃包丁, "willow blade knife") is the quintessential Japanese sashimi knife — a long, slender, single-bevel blade designed for one purpose: slicing raw fish into flawless pieces. Every sushi restaurant in Japan relies on a yanagiba, and it remains the single most important knife in a sashimi chef's toolkit. Its name comes from the blade's resemblance to a willow leaf (yanagi), and its design has barely changed since the Edo period.
What Is a Yanagiba Knife?
Our editorial team spoke with sashimi chefs at specialist shops in Kappabashi and tested yanagiba knives across multiple price ranges to compile this guide. The advice here reflects both professional daily use and our hands-on experience from store visits in March 2026.
The yanagiba is a long, narrow, single-bevel knife purpose-built for slicing raw fish. Unlike Western slicing knives that use a back-and-forth sawing motion, the yanagiba is designed for a single, uninterrupted pulling stroke — you draw the entire blade length through the fish in one motion, from heel to tip. This technique, called hiki-giri (引き切り), produces mirror-smooth cuts that preserve cell structure, preventing the fish from turning mushy or losing moisture.
Key characteristics of the yanagiba:
- Single bevel (kataba) — sharpened on the right side only (for right-handed users), creating an extremely acute cutting edge
- Long, narrow blade — typically 240-330mm, enabling full-length pulling strokes
- Spine taper — thick at the heel for rigidity, tapering to a thin, precise tip
- Flat back (ura) — a concave hollow on the back side that reduces friction and helps food release
- Pointed tip — for decorative cuts, scoring, and precision detail work
History & Origin
The yanagiba developed in the Kansai region (Osaka-Kyoto area) during the Edo period (1603-1868), when sashimi culture flourished in Japan's merchant cities. As raw fish preparation became an art form, chefs needed a knife that could produce clean, glistening slices — and the yanagiba was their answer.
In the Kanto region (Tokyo area), a related knife called the takobiki (蛸引き) evolved with a squared-off tip and flatter profile. Both serve the same purpose — slicing sashimi — but the yanagiba's pointed tip proved more versatile, and today it dominates nationwide. The takobiki persists mainly among traditionalists in Tokyo.
The craft of making yanagiba knives centers in Sakai, Osaka, where bladesmiths have forged kitchen knives since the 16th century. Sakai remains the premier production center, though Seki (Gifu), Tsubame-Sanjo (Niigata), and Takefu (Fukui) also produce excellent yanagiba knives.
Single-Bevel Design
The defining feature of a yanagiba is its single-bevel (kataba) edge geometry. Unlike double-bevel knives that are sharpened symmetrically on both sides, the yanagiba has:
- Omote (表, front face) — the beveled side, ground at approximately 10-15° to form the cutting edge. This is where you sharpen.
- Ura (裏, back face) — the flat side with a subtle concave hollow (urasuki). This concavity reduces surface contact with the food, minimizing drag and aiding clean release.
This asymmetry gives the yanagiba two critical advantages for sashimi. First, the acute single bevel produces an edge that is sharper than any double-bevel knife can achieve — important when cutting through delicate raw fish without tearing fibers. Second, the flat back naturally guides the blade in a straight path, allowing chefs to produce perfectly uniform slices.
The tradeoff: single-bevel knives are hand-specific. A right-handed yanagiba cannot be used left-handed (the bevel would push the blade away from the cutting line). Left-handed versions exist but are rarer and typically cost 10-20% more.
How to Use a Yanagiba
Correct technique is essential with a yanagiba. The fundamental rule: one stroke, one cut.
The Pulling Stroke (Hiki-Giri)
- Position the heel of the blade at the far edge of the fish fillet, with the blade angled slightly away from you.
- Draw the blade toward you in a single, smooth motion, using the full length of the blade from heel to tip.
- Let the weight of the knife do the work — apply minimal downward pressure. The sharpness of the blade and the length of the stroke do the cutting.
- Complete the stroke through the tip — the slice should separate cleanly as the tip exits the fish.
Never saw back and forth. Each slice should be accomplished in one pull. This preserves the cellular structure of the fish, resulting in a glistening, smooth surface that looks and tastes better. Multiple strokes create microscopic tears that make the fish appear dull and release moisture.
Common Sashimi Cuts
- Hira-zukuri (平造り) — standard rectangular slices, 8-10mm thick. The most common sashimi cut.
- Usu-zukuri (薄造り) — paper-thin translucent slices for whitefish (fugu, hirame). Requires exceptional knife sharpness and control.
- Sogi-zukuri (そぎ造り) — angled slices, drawn diagonally across the grain to maximize surface area.
- Ito-zukuri (糸造り) — thin julienne strips for garnish or squid preparation.
Specifications
| Specification | Detail |
|---|---|
| Blade Length | 240-330mm (270mm standard) |
| Bevel Type | Single bevel (kataba) — right-handed standard |
| Steel Options | Shirogami #1/#2, Aogami #2/Super, Ginsan, VG-10 |
| Weight Range | 130-200g (varies by length and steel) |
| Blade Profile | Long, narrow, pointed tip — willow leaf shape |
| Handle Style | Traditional wa-handle (D-shape or octagonal) |
| Best For | Sashimi, sushi neta, raw fish slicing, decorative cuts |
Size Guide
| Length | Best For | User Level |
|---|---|---|
| 240mm (9.4") | Home kitchen, small fish fillets, beginners | Beginner to intermediate |
| 270mm (10.6") | All-purpose sashimi, most fish types — the standard size | Intermediate to professional |
| 300mm (11.8") | Large fish, professional sushi counters | Professional |
| 330mm (13") | Tuna, very large fillets, high-volume sushi restaurants | Expert professional |
Our recommendation: Start with 270mm. It is the most versatile size — long enough for proper pulling strokes on medium to large fillets, yet manageable for home kitchens. Only choose 240mm if counter space is very limited or you primarily prepare small fish.
Yanagiba vs Sujihiki
The yanagiba and sujihiki (筋引き) are both long slicing knives, but they differ fundamentally in design and purpose.
| Feature | Yanagiba | Sujihiki |
|---|---|---|
| Bevel | Single bevel | Double bevel |
| Primary Use | Raw fish (sashimi, sushi) | Raw fish + cooked proteins |
| Cut Quality on Sashimi | Superior — cleaner, smoother surface | Very good, slightly below yanagiba |
| Versatility | Specialist (raw fish only) | Versatile (raw + cooked) |
| Sharpening | Single-bevel technique required | Standard double-bevel sharpening |
| Handedness | Right or left specific | Ambidextrous |
| Weight | Heavier (thicker spine) | Lighter (thinner profile) |
Choose a yanagiba if sashimi is your primary focus and you are willing to learn single-bevel sharpening. Choose a sujihiki if you need one knife that handles both raw fish and roasted meats, or if you prefer easier maintenance.
Steel Types
Steel choice is critical for a yanagiba because the blade must hold an extremely keen edge for clean sashimi cuts. Here are the most common options:
Shirogami (White Steel)
White #2 is the most popular steel for yanagiba knives. Pure carbon steel with no added alloys — it takes the sharpest possible edge and is the easiest carbon steel to sharpen. White #1 is the harder, more refined version that holds its edge longer but is more brittle. Professional sushi chefs who sharpen daily overwhelmingly prefer White Steel for the purest cutting feel.
Aogami (Blue Steel)
Blue #2 adds chromium and tungsten to the carbon steel formula, resulting in better edge retention and slightly more toughness. Blue Super (Aogami Super) pushes this further with even longer edge life. The tradeoff: Blue Steel is slightly harder to sharpen and does not achieve quite the same level of ultimate keenness as White Steel. Best for users who want to sharpen less frequently.
Stainless Options
Ginsan (Silver #3) is the stainless steel closest in performance to carbon steel — it takes a very good edge and is significantly easier to maintain. VG-10 offers more corrosion resistance but feels less refined on the stone. For home cooks who don't want to worry about rust and patina, stainless yanagiba knives are practical, though serious sashimi enthusiasts usually prefer carbon.
Single-Bevel Sharpening
Sharpening a yanagiba requires a different technique from double-bevel knives. The single-bevel geometry must be maintained precisely, or the knife loses its cutting performance.
Sharpening the Bevel Side (Omote)
- Soak your whetstone (1000-grit) for 10-15 minutes.
- Place the bevel flat against the stone — the entire ground surface should make contact. This is approximately 10-15°.
- Apply even pressure with three fingers spread across the blade and draw the blade forward and backward along the full length of the stone.
- Work from tip to heel in sections, spending equal time on each section.
- Continue until you feel a consistent burr (kaeri) along the entire edge on the flat side.
Deburring the Flat Side (Ura)
- Flip the knife and lay the flat side completely flat on the stone — do not raise the spine.
- Make 2-3 light, gentle strokes to remove the burr. That is all.
- Over-grinding the ura destroys the concave hollow and ruins the knife's geometry. Less is more.
Polishing
Repeat the process on a 3000-grit stone, then optionally on a 6000-grit stone for a mirror polish. The finer the finish, the cleaner the cut on delicate fish. Many sushi chefs polish to 6000-8000 grit for whitefish preparation.
Maintenance & Care
Single-bevel carbon steel yanagiba knives require diligent care. Here is what sushi professionals do daily:
- Wipe dry immediately after every use — carbon steel rusts within minutes when wet. Keep a dry cloth next to your cutting board.
- Clean with a soft sponge and mild soap — never use abrasive scrubbers or dishwashers.
- Apply camellia oil (tsubaki oil) before storage — a thin coat prevents oxidation. Wipe off before use.
- Store in a saya (wooden sheath) or on a magnetic knife rack — never in a drawer where the edge can contact other metal.
- Develop the patina — carbon steel naturally forms a dark patina (oxidation layer) that actually protects the steel. Don't try to remove it.
- Sharpen regularly — for home use (weekly sashimi), sharpen every 2-4 weeks. Professional chefs sharpen before every service.
Our Recommendations
Best Budget: Tojiro Shirogami Yanagiba (270mm) — ~$80
White #2 carbon steel with a simple magnolia handle. Tojiro offers remarkable quality at this price — the blade takes an excellent edge and responds well to sharpening. The best entry point for learning single-bevel technique without a large investment.
Best Mid-Range: Sakai Takayuki Kasumitogi Yanagiba (270mm) — ~$150
White #2 steel with a traditional kasumi (mist) finish, forged in Sakai. Beautiful blade with excellent edge characteristics. The soft-iron cladding develops a distinctive patina over time. A knife that performs at professional levels without the professional price tag.
Best Premium: Masamoto KS Yanagiba (270mm) — ~$300
White #2 steel, hand-forged in Tokyo. Masamoto KS is the standard at high-end sushi counters across Japan. Exceptional fit and finish, perfectly balanced, and takes an edge that makes whitefish preparation effortless. A lifetime investment for serious sashimi practice.
Best Stainless: Suisin Inox Yanagiba (270mm) — ~$180
Swedish stainless steel, ideal for home cooks who want yanagiba performance without carbon steel maintenance. Won't rust, easy to sharpen, and produces very clean cuts. The practical choice for occasional sashimi preparation.